Layout & header
Retitle the header, add your own buttons, and move or hide the editor's panels — all through the ui option.
The editor arranges itself into four pieces: the header along the top, the node palette down one side, the config panel that shows a selected node’s settings, and the canvas toolbar with zoom and undo. It lays them out for you, so you usually don’t have to think about it. This page is for when you do — when you want to put your product’s name in the header, add a “Publish” button, move a panel to the other side, or hide one a screen doesn’t need.
All of it lives under the ui option.
Title and buttons in the header
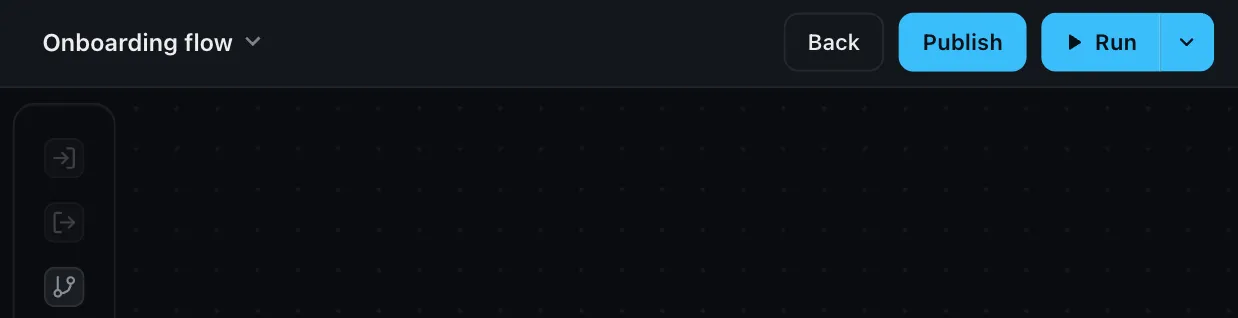
The header carries the workflow’s name, the Run button, and run status. Use
ui.header to set your own title and add buttons next to Run — a back link, a
publish action, anything your screen needs:
createWorkflowEditor(element, {
  ui: {
    header: {
      title: 'Onboarding flow',
      actions: [
        { label: 'Back', onClick: () => history.back() },
        { label: 'Publish', variant: 'primary', onClick: () => publish() },
      ],
    },
  },
})
Each action takes a label and an onClick; add variant: 'primary' to give one
the accent treatment, or disabled: true to grey it out. For full control, title
also accepts a function returning your own element instead of a string.
Move or hide a panel
The node palette and config panel can sit on either side, and the toolbar at the
top or bottom. Each takes a position:
createWorkflowEditor(element, {
  ui: {
    nodePalette: { position: 'right' },
    configPanel: { position: 'left' },
    toolbar: { position: 'top' },
  },
})
To hide any of them, pass false:
createWorkflowEditor(element, {
  ui: {
    toolbar: false, // no canvas toolbar
  },
})
Hiding the whole panel set
For common cases like a non-editable viewer, you usually don’t need to hide
panels one by one — an editor mode
already curates the right set. Reach for false when you’re building a layout the
modes don’t cover.
Where next
- Mobile — how the editor adapts to small screens and touch
- Editor modes — edit, read-only, and preview
- Custom result rendering — control how a run’s output is displayed